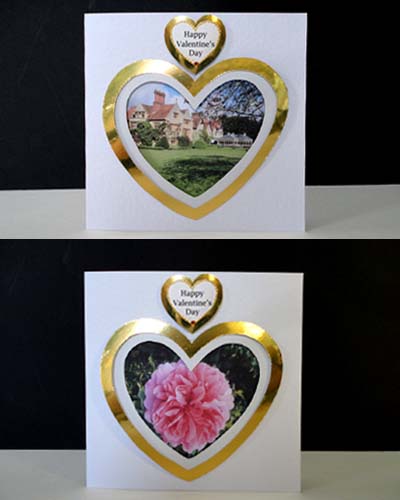
Yes, I know Valentine’s Day is this weekend and if you haven’t yet found that perfect card, then don’t panic you can easily make your own! Many people send their personal photographs to online companies to produce cards, and that’s fine, but it is quite easy to make your own. You have the photographs at your fingertips that can really make a special and personal card with just a little effort.
At the moment not many retail shops are open of course, so I’ve devised a simple card that you can create very easily from materials that you might have at home or simply buy from a supermarket – usually in the ‘Children’s Art/School Section’ (for example, white card, glue, paper tape etc…).
Not only is this card perfect as a Valentine’s Day Card but, with a little tweaking of the text can be used as a template for Birthdays, Anniversaries, Father’s Day and Mother’s Day, or for any occasion really.
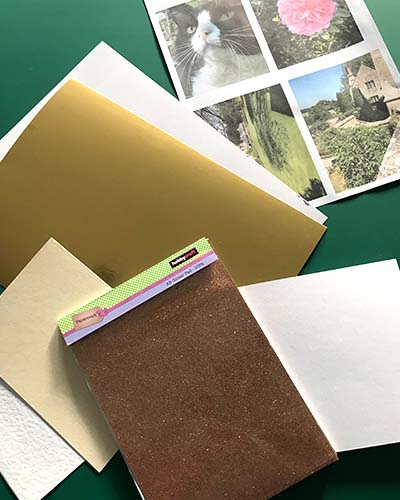
Materials:
- Plain white card & envelope 150 x 150 mm (or make your own from a sheet of A4 card)
- White paper
- White card
- Tracing paper
- Sheet of gold/silver metallic card, glitter card or just coloured/patterned card.
- A selection of photographs or pictures.
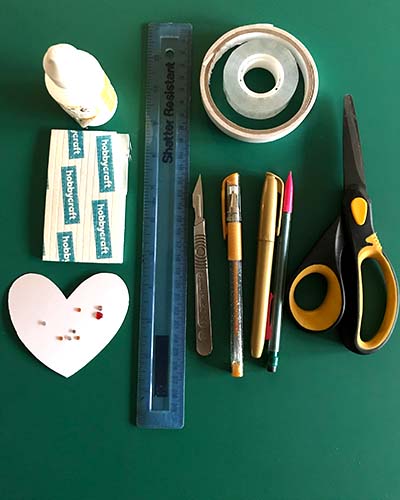
Equipment:
- Scissors
- Scalpel
- Ruler
- Pencil
- Gold felt pens
- Adhesive foam pads
- Double-sided tape
- Sellotape tape
- Amber / red glass gems
- Clear drying glue
As you can see from the finished cards above, we are going to make a heart-shaped picture frame with an inside mount, so it really looks professional. Of course, as an option these layers could just be stuck flat if you find this a bit too time consuming.
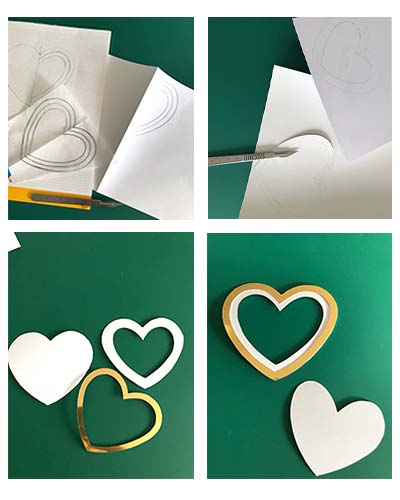
Firstly, drawing a heart – I always find it easier to get a perfect shape by folding the paper in half so you get a mirrored drawing, whether using tracing paper or ordinary printer paper. Baking paper makes good tracing paper if you don’t have the real thing. Or just simply get the shape off the internet, print and use as a template. The size of my heart is 11cms deep by 12cms wide.
Inside the heart shape we need to draw another two layers so that when we cut them out, we have the frame and a mount. The aperture size will be 8cms deep by 9cms wide.
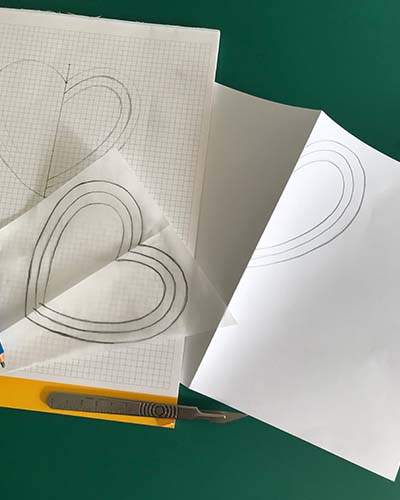
Drawing on the back of the gold card we now need to cut out the outer layer; from the white card cut out the centre leaving the double layers. As the gold frame will be affixed to this white hollow heart. Also, cut another full-sized heart which will form the backing to the photograph.
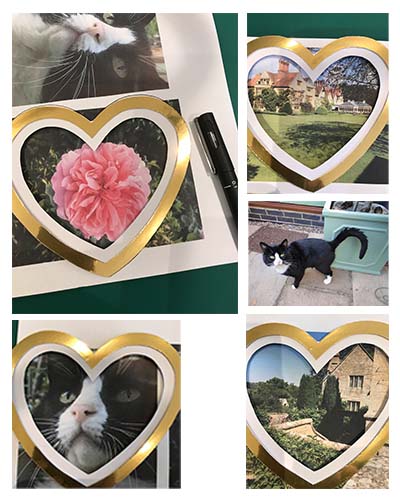
Next, you can have a bit of fun choosing a photograph you like. As this card is for your Valentine, it could be a favourite pet, flowers from the garden, you both celebrating at dinner, a humorous occasion, or a memorable place you both love and hold dear – like the one I have chosen where we have celebrated with some amazing dinners.
When you have the right view in the aperture of the heart draw around the outside and cut out.
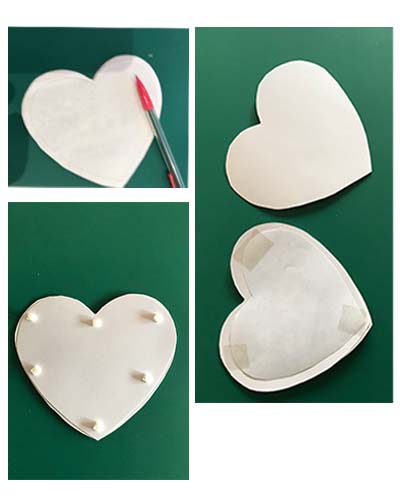
We can now affix the photograph, making sure you trim it a little to be smaller than the back of the heart, then fix it in place with Sellotape. Using double-sided tape or glue put on the other full white card heart. Once it is firmly stuck down add the foam pads or you can stick it directly onto the card once you have made and positioned the small heart, which we are going to make for the text.
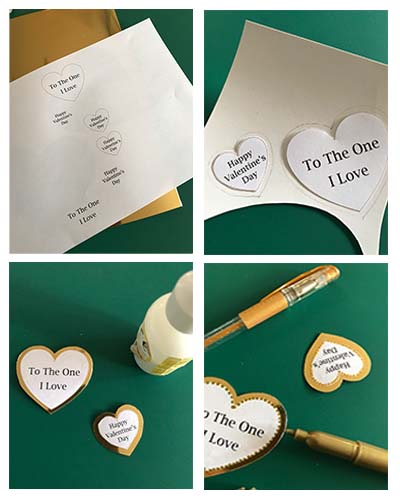
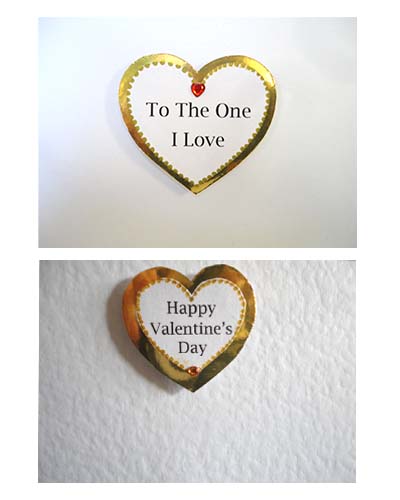
Text can be handwritten or printed which ever is easier. The small gold heart for the front is 3.5 deep x 4 cms wide the white inside shape is 0.5 cms less all round.
The larger gold heart for inside is 5.5cms deep x 6.5cms wide. The inside shape for the text again less 0.5cms all round.
The text I have just printed on the computer, either in a heart shape or just draw your shape around the text after.
After you have cut out the two hearts glue the white heart with your message onto the front.
Using a gold ink pen I have followed the inner line with dots – it just makes a better finish.
Centrally position the small heart at the top of the card front and the larger one inside. Finish them off with a glass gem. Then you can place the main feature heart in line with the small one on the front, either with foam pads or just glue.
Here are just a few images showing alternative photographs and the inside of the card once finished.
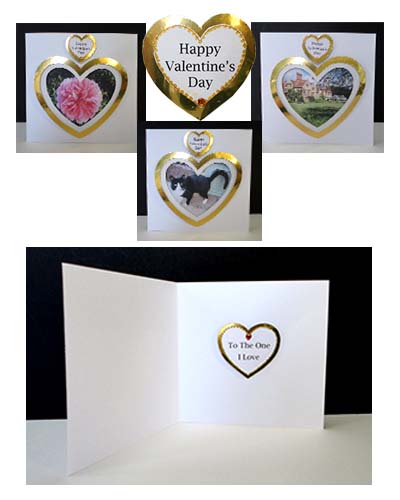
This idea as I mentioned above can be used for all occasions, using a square, rectangular, circular or any shaped frame. With your own photographs, pictures, artwork, material or just text you can really make unique cards for friends and family.
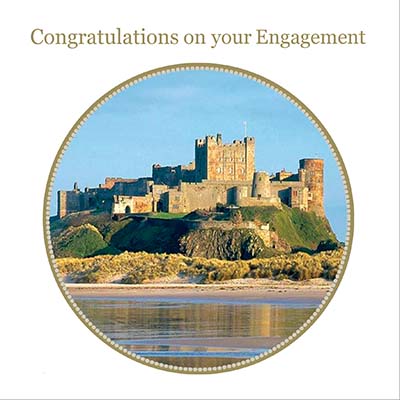
Above is a commissioned personalised card I created especially for an Engagement, a photograph of the couple’s favourite place! I hope you have time to make that special card for your Valentine, but if not there’s always a Birthday on the horizon!

