
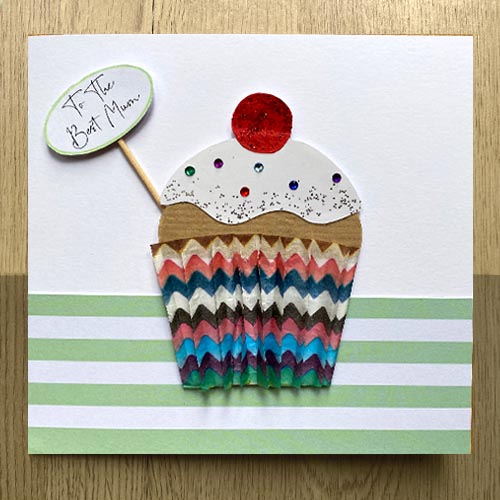
It’s Mother’s Day on Sunday, but there is still time to make that unique handmade card to really say thanks for everything.
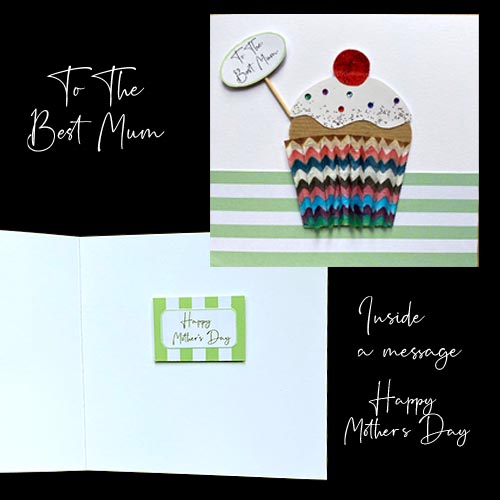
A few of my Mother’s Day cards are designed around afternoon tea with cups, flowers, and cakes, so a delicious muffin card that is easy to make yourself came to mind. I try to use items that you may already have around the house, such as wrapping, tissue or brown paper and you don’t need these in large quantities!
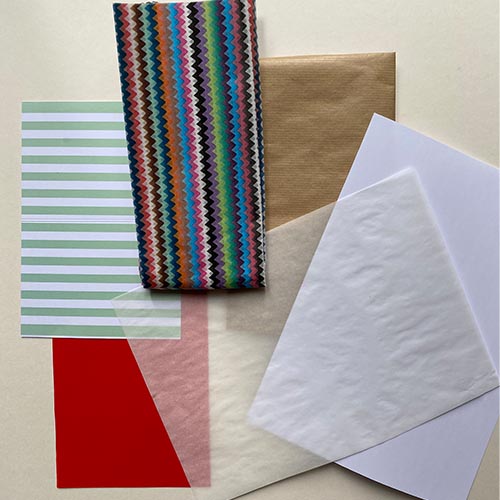
Materials
- A 150 x 150mm square card with larger envelope
- A4 sheet of white card
- A4 sheet of white paper
- Tracing paper
- Brown wrapping paper
- Red paper or card
- Patterned card or paper (green stripe)
- Patterned tissue paper or a pretty bun or muffin paper case.
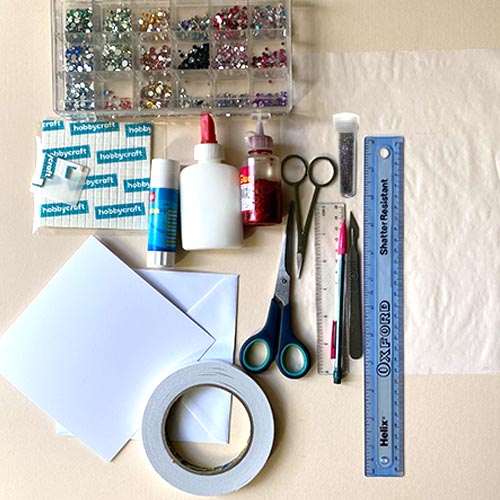
Equipment
- Scissors
- Scalpel
- Ruler
- Pencil
- Glue/glue stick
- Adhesive foam pads
- Double-sided tape
- Masking tape
- Glass gems
- Silver & red glitter
- Cocktail stick
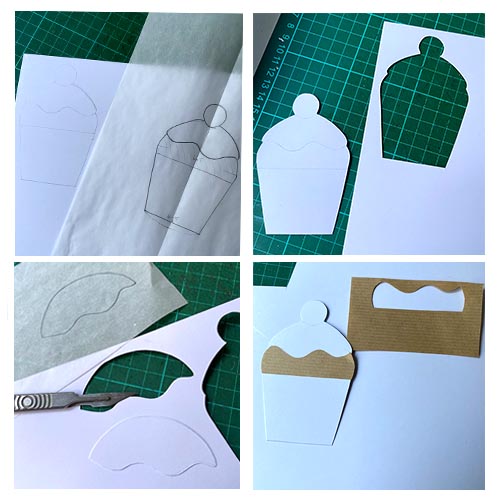
Doing a sketch first just helps to get the visual image and measurements correct for the 150 mm square card. Of course, you may choose a different size or shape – the choice is yours. But for this size I’ve worked out some measurements which you can follow if need be.

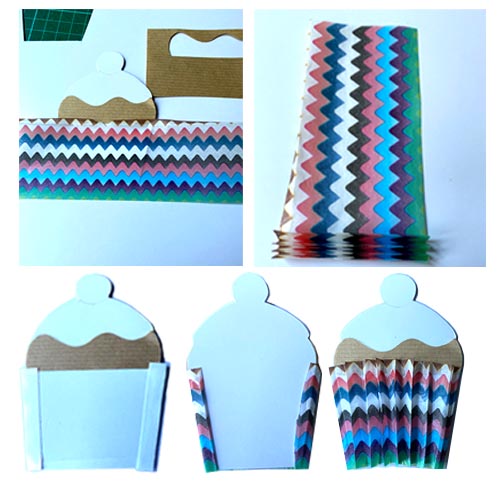
Tracing the shape is a good idea, as half drawn with a crease down the middle helps you get a perfect balanced shape. You can then trace this onto the white card ready to be cut out. The top shape – the icing – is cut out separate, keeping it a fraction larger to cover the bun.
The middle cake section is cut out of the brown paper and stuck in place.
Measure out a good length (6cms) and a perfect depth of the tissue paper and concertina into pleats. Here you could easily make life easy and use a patterned bun or muffin paper case to wrap around the shape. Double-sided tape, on the back edges and a little top and bottom on the front will make sure the case stays in place.
The icing section of the cake gets a sprinkle of silver glitter and is glued onto the cake in place. Random different coloured glass gems are added for extra sparkle. Cut out a red cherry slightly bigger and cover in red glitter then glue into place.

This cake needs to be placed on a surface, a nice cleaned striped tablecloth perhaps. You may prefer a floral or spotted design – here I have chosen a clean green and white horizontal stripe. The card strip is 5.5cms in height and adhered with double sided tape onto the front of the card, to remain firmly in place.
Also using this striped card, I have made a rectangular box with the message ‘Happy Mother’s Day’ glued in the centre. ‘To the Best Mum’ is a message for the front of the card printed, stuck on a piece of card, with a green edge added will be displayed using a cocktail stick.
Masking tape is used to keep the cocktail stick in place at both ends. Adhesive foam pads are attached on the reverse side of all the parts, then they are simply mounted in place.
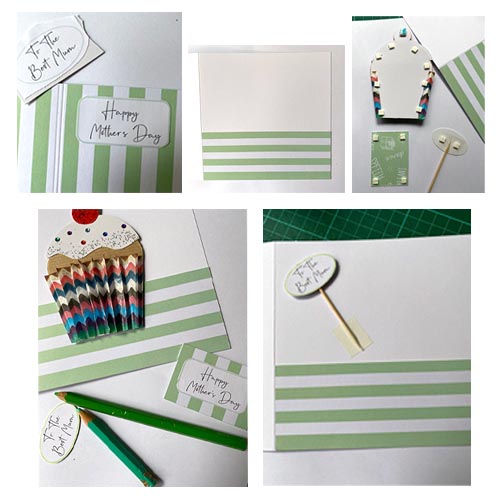
So here is your fabulous ‘Mother’s Day’ card. This is just an idea to spark your imagination. Colours, patterns, embellishments, and messages are all your personal choice.
Remember, handmade cards don’t have to be perfect to look at; what matters is the perfect thought that goes into them and the love you portray by creating a unique card for a very special person in your life.
This card can easily be adapted for Birthdays, Congratulations, an Afternoon Tea invitation or even a Get-Well card to cheer up someone’s day!