Materials:
Photograph- print or painted large flower head.
Small flowers and leaves.
White greetings card 150 x 150 mm
Cutting board
Craft PVA
Masking tape or spray mount.
Double-sided foam pads
Printer and computer (optional.)
When making new handmade greetings cards it isn’t always necessary to start an idea from scratch. The card I am making to today is up-dating an existing design, that I feel works really well and still has possibilities for a fresh look. The original design has a Carnation as the central flower, and here I am using a beautiful cerise-coloured rose.
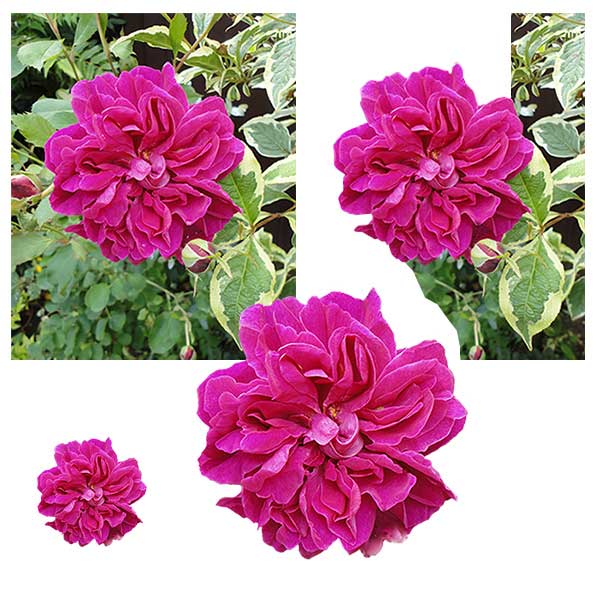 This stunning Rose, photographed in my garden is cut and separated from its background in Photoshop. But, without a computer you could use an image from a magazine, wallpaper, wrapping paper, or one you have painted or cut directly by hand from a printed photograph.
See my beautiful range of handmade birthday cards that are available to purchase
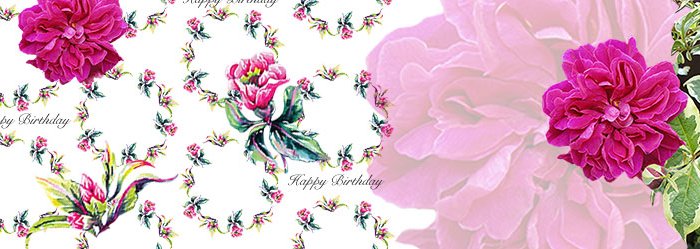
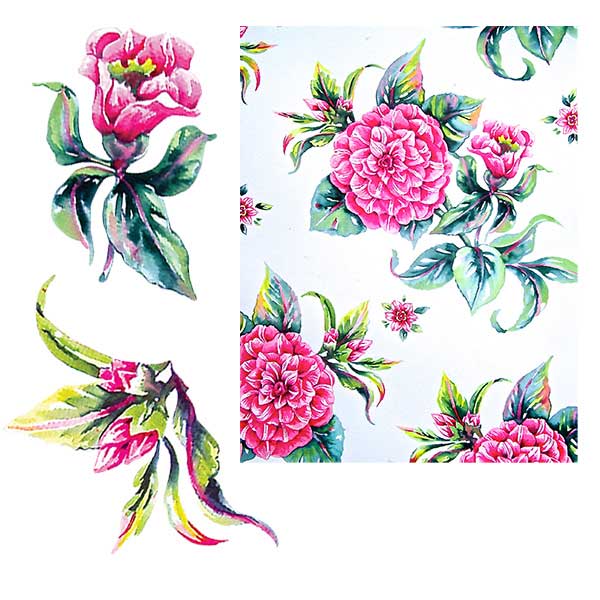 You will now need some smaller flowers and leaves to create a circular garland for the rose to sit on centrally. Taking a hand-painted floral design from my collection, I have chosen some buds and another flower not yet in complete bloom. Again, I have cut these out in Photoshop ready to construct my pattern.
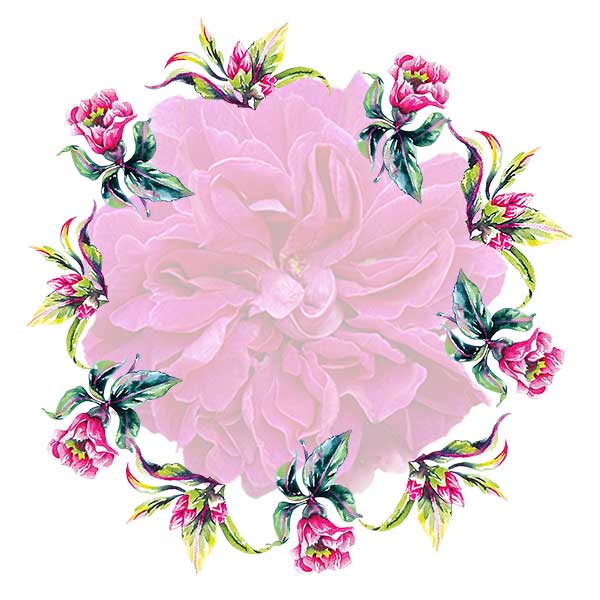 To put this design together you require a drawn square accurate in size to represent the front of your card. Alternatively, you can arrange the design directly on to the front of the card. Find the central point to work from, place the band of flowers correctly; I have lowered the gradient on the rose so I can see clearly the spacing. Here, if you have not printed this floral circle but are sticking the images directly on the card, then just use a faint outline for the rose.
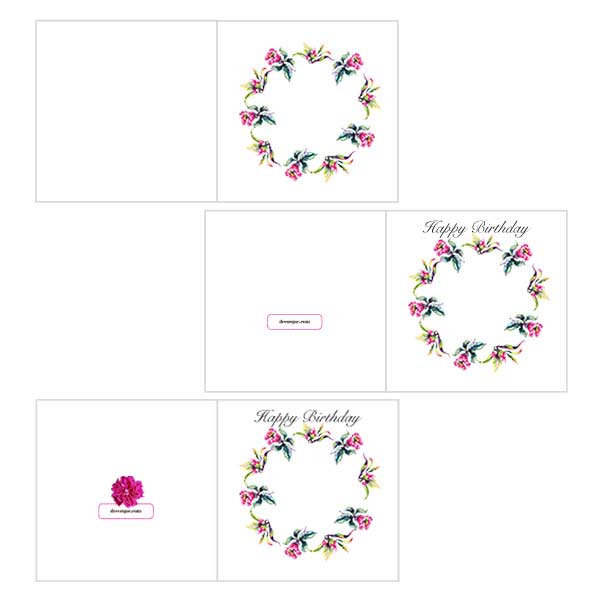 When printing this card, which fits easily on an A4 sheet of paper, I first print the flat card drawn out with the images on, so this is the template for printing. The card can be attached in place by spray mount or masking tape doubled, but not too sticky as this may mark the card when removing it after printing.
Don’t have the time to make a handmade card? Purchase one of my beautiful handmade birthday cards
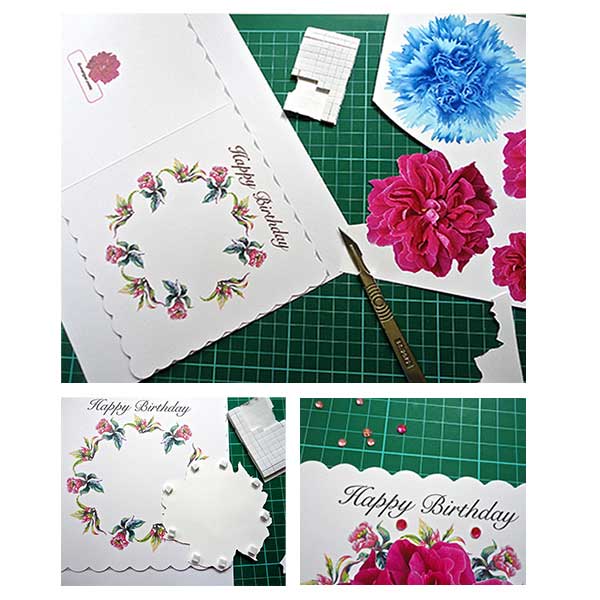 I have used a white scalloped edge card which still fits nicely in the template which is removed when printing. The card is then printed with a Happy Birthday text created in Illustrator. You can buy greetings text, such as Happy Birthday, ready to stick on if you wish or try some Faux Calligraphy, see my blog on Creative Khadija.
I print the main flower on Epson Matt paper, as you never lose that fresh appearance of reality and colour. This is hand-cut and mounted on the card with small doubled-sided foam pads and a few pink glass gems spaced for a bit of sparkle.
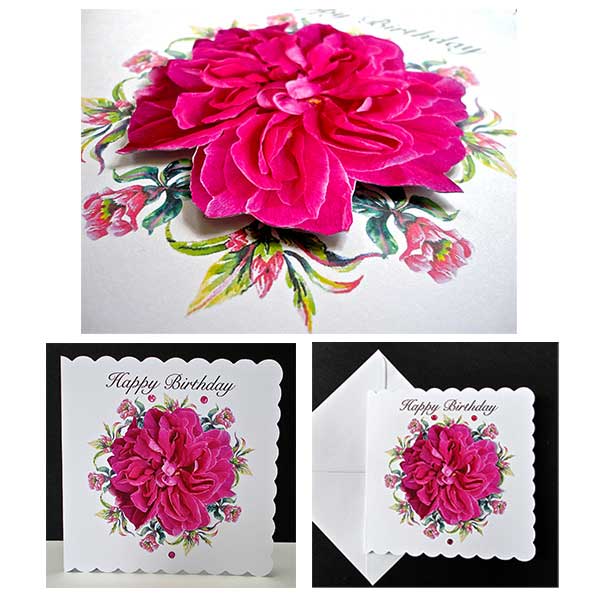 As you can see, the Rose standing out in relief above and overlapping the water- coloured flowers has a stunning effect, which brings the card to life. You can purchase this card here.
I hope you have fun and enjoy creating your own card to delight a friend or a family member on a special occasion.

One thought on “How to Make a Handmade Birthday Card”