
It’s International Friendship Day on the 30th July. I think most of us have many friends but may be only one or two really special friends that have been with us through the good times and the bad over the years. I think in the last few months our friends may have been kept at a distance and so keeping in touch has never been more important.
We should not need a Friendship Day to remind us of our friends but it’s a good idea to think about going that extra mile and doing something really personal and special for that person.
A Handmade card is something we can all have a go at; with a little inspiration, it’s great fun and you never know it may bring out a creative side which you didn’t realise you had!
I make many handmade cards for all events and occasions, personalised and some commissioned for extra special celebrations. All my cards involve hand-painted, photographic images mixed with Illustrator or Photoshop, but I appreciate not everyone has this technology at their fingertips, so all my new guides are very practical, but the ideas can be elaborated using technology too.
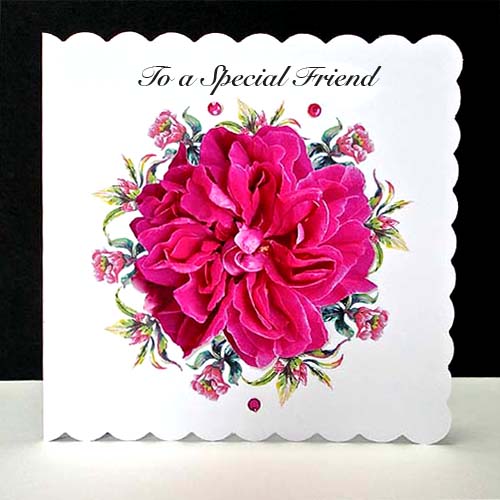
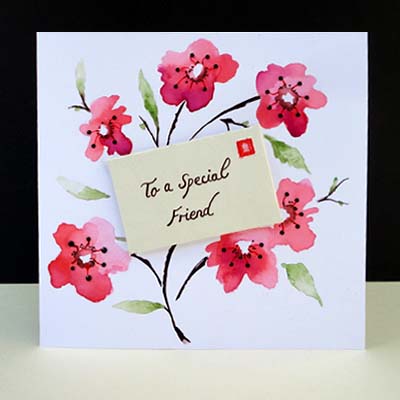
The handmade card I am creating today is ‘To a Special Friend’ card. You can make this lovely card with easy-to-follow instructions. With your own choices of material, colour and text you can really make it your own personal design.
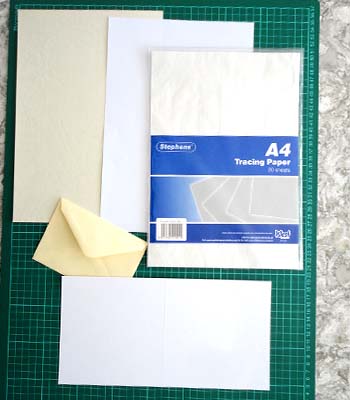
Materials
- Plain white card & envelope 150 x 150 mm (or make your own from a sheet of A4 card)
- White paper
- Tracing paper
- Sheet of cream textured card (your colour choice here)
- A picture of a blossom or flowers you want to feature – or image from the Internet
- A cream envelope to get a template from – or cut up and use for the envelope on the card.
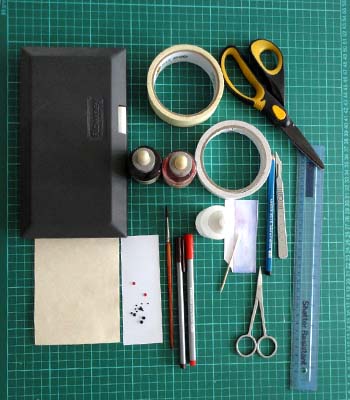
Equipment
- Scissors
- Scalpel
- Ruler
- Pencil
- Red/Brown felt pens
- Adhesive foam pads
- Double-sided tape
- Masking tape
- Water colour paints / inks red, dark red, olive green
- Water-colour
- Black / red glass gems
- Clear drying glue
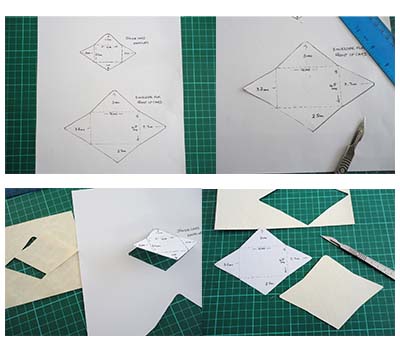
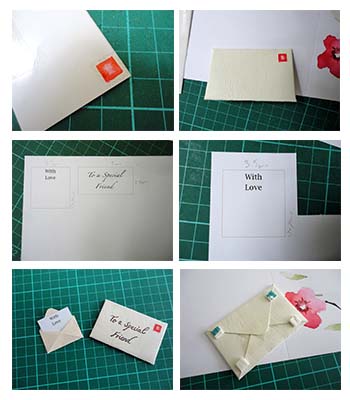
I think initially drawing a quick sketch of the design is a good starting point, with some small quick ideas of other features. I have drawn out the 150mm square on paper and a linear spray of blossom with simple shapes. Cutting out a rectangle to represent the front envelope is a good idea so you can arrange the flower heads around it.
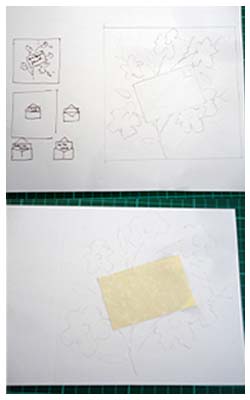
I have drawn out a detailed plan of the large envelope which will be 7cms x 4.5cms – side flaps are 3.7cms to a point, bottom 2.5cms and top 3cms as it always overlaps to fasten. The smaller envelope for the inside can be in a thinner paper as it will be stuck flat to the card. It is 4cms x 2.5cms, both side flaps are 2cms out to point, bottom 1cm and top 1.5cms
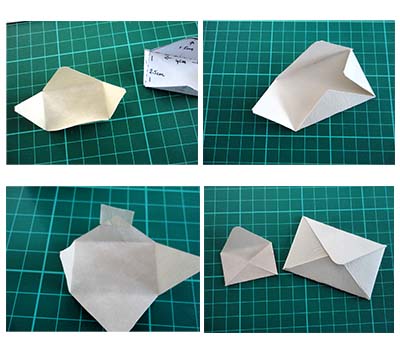
Once the shapes are cut out, just crease along the lines and fold in closing the top last as you would normally. Do this for both envelopes.
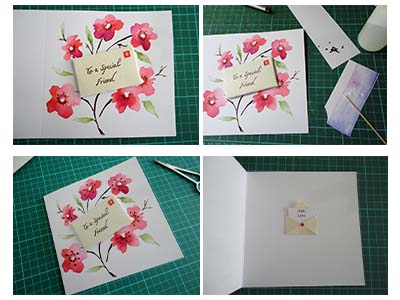
Painting some blossom or flowers does not have to be difficult, simple shapes can be brought to life with water-colour. After you’ve sketched or traced your design on to the card in a faint line if possible, just use the colour like a blob filling the shape, then blotting one side to give them light and dark tones. The secret is to work while the paint/ink is wet to add a darker tone if needed. The thin branches are drawn in with a dark brown fine tip felt pen.
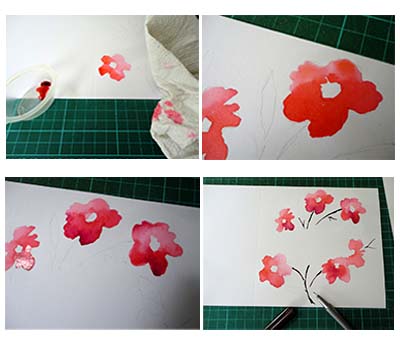
The olive coloured leaves have been treated the same with varying tones. As you can see, I have left the flower centres blank to accentuate the small dark brown dots/anthers forming the edges.
While the water colour flowers are drying it’s time to finish off those extra bits. I have painted a small first-class stamp on a label to ready for the large envelope, this doesn’t have to be exact, it’s just a suggestion of the real thing. You could replace this with another flower if you wish. Text is always difficult so you can copy/trace/or use words printed on the computer. Here I have copied a font and handwritten ‘To a Special Friend’ in brown felt pen, the small message to go into the tiny envelope inside I have printed in a box and cut to fit so the text shows at the top. The large envelope needs to be firmly closed with tape and then adhered in place with foam pads. Inside the card the envelope is glued flat with double sided Sellotape.
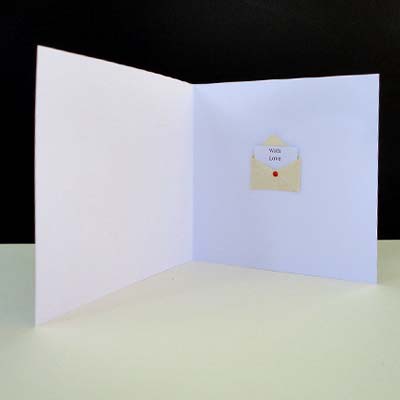
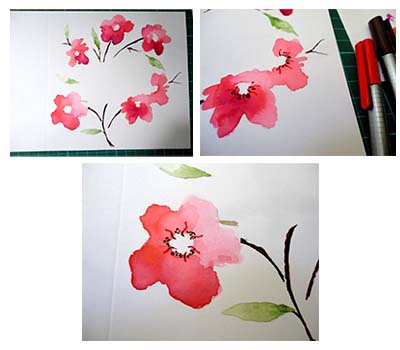
Now to bring those flowers to life. Red filaments are drawn in felt pen and finished off with tiny black glass gems to form the stamen. With the front envelope in place, affix the small one centrally inside with the paper message ‘With Love’ just showing and finish it off with a red glass gem.
Of course, you can make this card your own unique design with different flowers, painted, cut from existing cards, from photographs or perhaps a floral wrapping paper covering the background. Stripes, checks, birds, animals – the options are endless. The letter could be replaced with a postcard made from a photograph if you wish to make it more personal, or just add your friend’s name.
I think someone will be happy to receive a beautiful handmade card from a dear friend on such a special day! Oh! And have fun making and creating!
Of course, if time is too tight to create and send your own Friendship card for July 30th, then take a look at Decorque Cards where you can purchase one!